Last Updated on November 28, 2022
During the 1970s, domestic automotive manufacturers began equipping their vehicles with a range of new and innovative components, intended to reduce exhaust emissions. This came in response to new governmental oversight of the era, which included the implementation of numerous environmentally conscious mandates.
As such technology progressed, a number of sensors were designed to provide direct feedback regarding the operational efficiency of a vehicle’s emissions hardware. This most notably included the introduction of oxygen or “O2” sensors. Sensors of this type made it possible for a vehicle’s ECM/PCM to differentiate between lean/rich conditions.
However, even today, many motorists find themselves with a number of questions regarding the orientation and operation of a vehicle’s numerous oxygen sensors. More specifically, the matter of identifying a particular O2 sensor, over its companion sensors, is often called into question. Luckily, this process is far less complicated than one might assume.
Read on to learn more about how to locate O2 sensors, as well as the value offered by understanding such information.
Bank 1 vs Bank 2
There are two specific designations used when outlining the location of a particular oxygen sensor. The first of which relates to the engine bank that an O2 sensor corresponds with.
When dealing with “V” configuration engines, one specific side of the “V” will be referenced as bank 1, while the other will be regarded as bank 2.
Determining the numerical order of these engine banks is reliant upon a knowledge of where an engine’s #1 cylinder is located. For example, many V8 engines are arranged with cylinders #1, #3, #5, and #7 on one bank (bank 1), while cylinders #2, #4, #6, and #8 will be located on the other (bank 2).
Regardless, the term “bank 1” is used to describe the engine bank housing the first cylinder.
Some engines are labeled along their blocks, providing consumers with data regarding the engine’s bank orientation. In other cases, it might be necessary to locate the factory-specific service literature for your particular vehicle when attempting to determine one engine bank from another.
Upstream vs Downstream
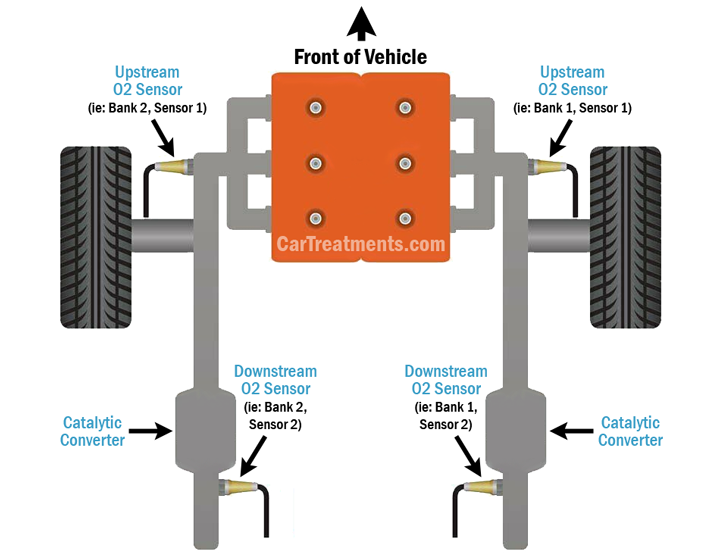
The second designation used to describe the location of a vehicle’s O2 sensor relates to its upstream versus downstream orientation.
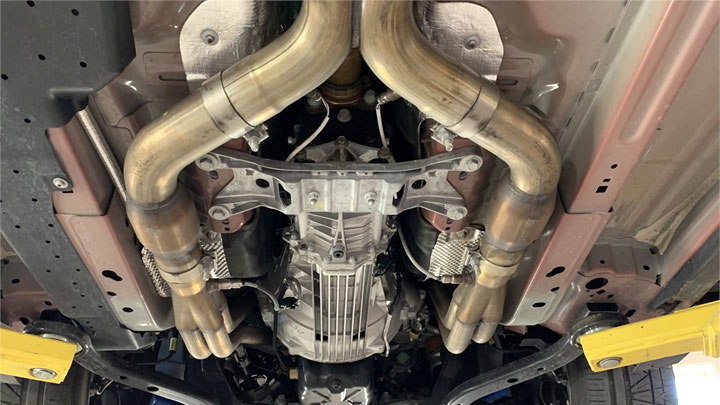
In the bulk of situations, a vehicle’s exhaust will feature two independent oxygen sensors for each engine bank. One of these two sensors will be positioned before (upstream) the inlet of a vehicle’s exhaust catalyst, while the other will be positioned to the rear (downstream) of this same catalyst.
Simply put, the terms upstream/downstream are used to describe the positioning of a vehicle’s O2 sensor to the exhaust’s catalyst, with consideration of the direction of exhaust flow. This is most easily understood by envisioning a vehicle’s exhaust as a flowing creek.
A vehicle’s catalytic converter would be located after a particular engine bank’s “upstream” O2 sensor, yet before the “downstream” O2 sensor on the same bank.
Oxygen Sensor Locations
Bank 1 Sensor 1 Location
A vehicle’s (bank 1, sensor 1) O2 sensor will be located ahead or upstream of the catalytic converter on the bank which corresponds to the engine’s first cylinder.
This is due to the fact that bank 1 is representative of an engine’s #1 cylinder, while sensor 1 serves as an upstream designation.
Example DTC: Code P2195
Bank 1 Sensor 2 Location
A vehicle’s (bank 1, sensor 2) O2 sensor will be located behind or downstream of the catalytic converter on the bank which corresponds to the engine’s first cylinder.
This is due to the fact that bank 1 is representative of an engine’s #1 cylinder, while sensor 2 serves as a downstream designation.
Example DTC: Code P2270
Bank 2 Sensor 1 Location
A vehicle’s (bank 2, sensor 1) O2 sensor will be located ahead or upstream of the catalytic converter on the bank which corresponds to the engine’s second cylinder.
This is due to the fact that bank 2 is representative of an engine’s #2 cylinder, while sensor 1 serves as an upstream designation.
Example DTC: Code P0154, Code P0175
Bank 2 Sensor 2 Location
A vehicle’s (bank 2, sensor 2) O2 sensor will be located behind or downstream of the catalytic converter on the bank which corresponds to the engine’s second cylinder.
This is due to the fact that bank 2 is representative of an engine’s #2 cylinder, while sensor 2 serves as a downstream designation.
Example DTC: Code P0157, Code P0158
Can There Be More Than Two Oxygen Sensors Per Side?
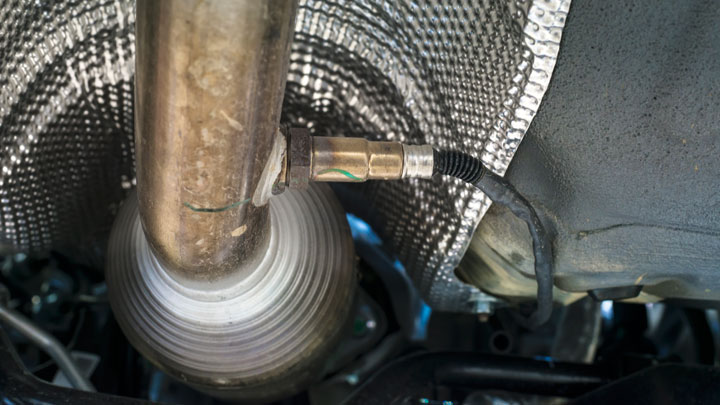
In most every instance, there will be no more than two oxygen sensors per bank. This stems from the fact that all engines require one O2 sensor per end of each catalyst used. Therefore “V” configured engines utilize a total of four individual oxygen sensors, to provide feedback to a vehicle’s PCM/ECM.
On a side note, four-cylinder engines almost always utilize only two individual oxygen sensors. This is due to the fact that engines of this configuration feature only one engine bank, and therefore utilize a single catalyst. This means that only one upstream and one upstream O2 sensor is required.
How to Locate an O2 Sensor Via OBD2 Scan Tool
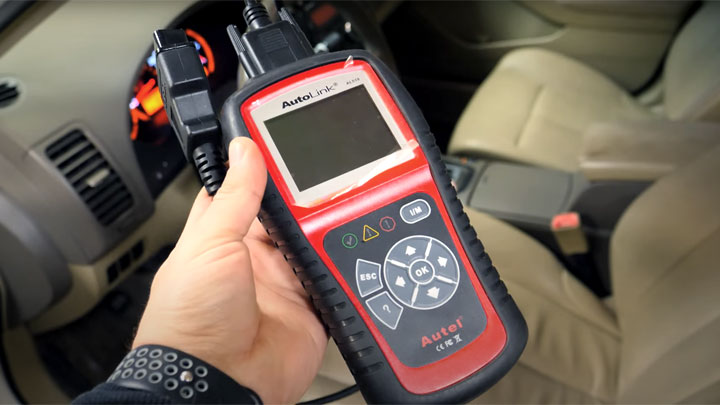
One can also use an OBD2 scan tool to determine the exact location of a particular scan tool. This process is quite easy to undertake, taking only minutes to complete. Additionally, locating an O2 sensor by these means is a rather full-proof method, saving both money and effort by eliminating any chance of mistakenly replacing the wrong O2 sensor.
Before attempting to locate a specific O2 sensor, make sure that your vehicle’s ignition is turned to the “ON” position, and that the OBD2 scan tool is inserted into its corresponding port. At this point, you can then disconnect each O2 sensor, one by one, while reviewing active codes logged on your scan tool.
As an O2 sensor is disconnected, an “open” or “voltage-high” code should be provided with a corresponding sensor location designation. Upon reconnecting this sensor and cycling your vehicle’s ignition, this DTC should be eliminated.
As such, you can continue to disconnect each sensor (one at a time), until you have positively identified the sensor that you have been searching for.

